e. Auto execute pipeline
In this section, we will update the sample Dockerfile created earlier to automatically trigger the container build and update to Amazon ECR as part of the CodePipeline we created earlier.
We will modify the Dockerfile to add extra scripts and input files that we will need to run a full example in the next lab.
- First confirm you are in the MyDemoRepo repository:
pwd # should be MyDemoRepo
- Download the input files.
The inputs/ files contain a set of default inputs that we will use. These files will be used to execute the “Lysozyme in Water” example described on the GROMACS tutorials website.
mkdir ~/environment/MyDemoRepo/inputs
curl -o ~/environment/MyDemoRepo/inputs/md_0_1.tpr https://sc22-hpc-labs.s3.amazonaws.com/gromacs/inputs/md_0_1.tpr
curl -o ~/environment/MyDemoRepo/inputs/topol.top https://sc22-hpc-labs.s3.amazonaws.com/gromacs/inputs/topol.top
- Add the entrypoint.sh script. This script will execute by default at the beginning of any container run to configure the container environment.
cat > ~/environment/MyDemoRepo/entrypoint.sh << EOF
#!/bin/bash

# load spack env
# shellcheck source=/dev/null
source /etc/profile.d/z10_spack_environment.sh

export OMPI_ALLOW_RUN_AS_ROOT=1
export OMPI_ALLOW_RUN_AS_ROOT_CONFIRM=1

cp /inputs/* /data
cd /data

"\${@}"
EOF
- Update the Dockerfile to the following.
cat > ~/environment/MyDemoRepo/Dockerfile << EOF
FROM spack/amazon-linux:v0.18.0 as build
# Add our spack.yaml file that defines our build and environment
ADD spack.yaml /opt/spack-environment/spack.yaml
# Set up spack env & binary cache, then build the software
RUN spack env activate -d /opt/spack-environment \
&&  spack mirror add binary_mirror https://binaries.spack.io/releases/v0.18 \
&&  spack buildcache keys --install --trust \
&&  spack install --reuse --use-cache --fail-fast \
&&  spack gc -y \
&&  spack find -v
# Create a script to activate the spack environment on load
RUN spack env activate --sh -v -d /opt/spack-environment > /etc/profile.d/z10_spack_environment.sh
ENTRYPOINT [ "/bin/bash", "-l" ]

# A multi-stage build can make images smaller and more efficient by keeping only files we need
FROM public.ecr.aws/amazonlinux/amazonlinux:latest as final
COPY --from=build /opt/software /opt/software
COPY --from=build /opt/view /opt/view
COPY --from=build /etc/profile.d/z10_spack_environment.sh /etc/profile.d/z10_spack_environment.sh
# Add yum requirements
RUN yum -y install \
      unzip \
      libgomp \
      libatomic \
      openssh-clients \
      openssh-server \
&&  yum clean all \
&&  rm -rf /var/cache/yum
# Add Gromacs launcher script and data files
ADD ./inputs /inputs
ADD ./entrypoint.sh /entrypoint.sh

# Setup SSH
## Generate host keys (required on amazon linux 2)
RUN ssh-keygen -A
## Add priviledge separation directoy to run sshd as root.
RUN mkdir -p /var/run/sshd
## Allow OpenSSH to talk to containers without asking for confirmation
## by disabling StrictHostKeyChecking.
## mpi-operator mounts the .ssh folder from a Secret. For that to work, we need
## to disable UserKnownHostsFile to avoid write permissions.
## Disabling StrictModes avoids directory and files read permission checks.
RUN sed -i "s/[ #]\(.*StrictHostKeyChecking \).*/ \1no/g" /etc/ssh/ssh_config \
    && echo "    UserKnownHostsFile /dev/null" >> /etc/ssh/ssh_config \
    && sed -i "s/[ #]\(.*Port \).*/ \122/g" /etc/ssh/ssh_config \
    && sed -i "s/#\(StrictModes \).*/\1no/g" /etc/ssh/sshd_config \
    && sed -i "s/#\(Port \).*/\122/g" /etc/ssh/sshd_config

# Setup run script
RUN chmod +x /entrypoint.sh \
&&  mkdir /data
ENTRYPOINT [ "/entrypoint.sh" ]
CMD [ ]
WORKDIR /
EOF
- Now we will update and push this file to the created codecommit repository
git add Dockerfile entrypoint.sh inputs
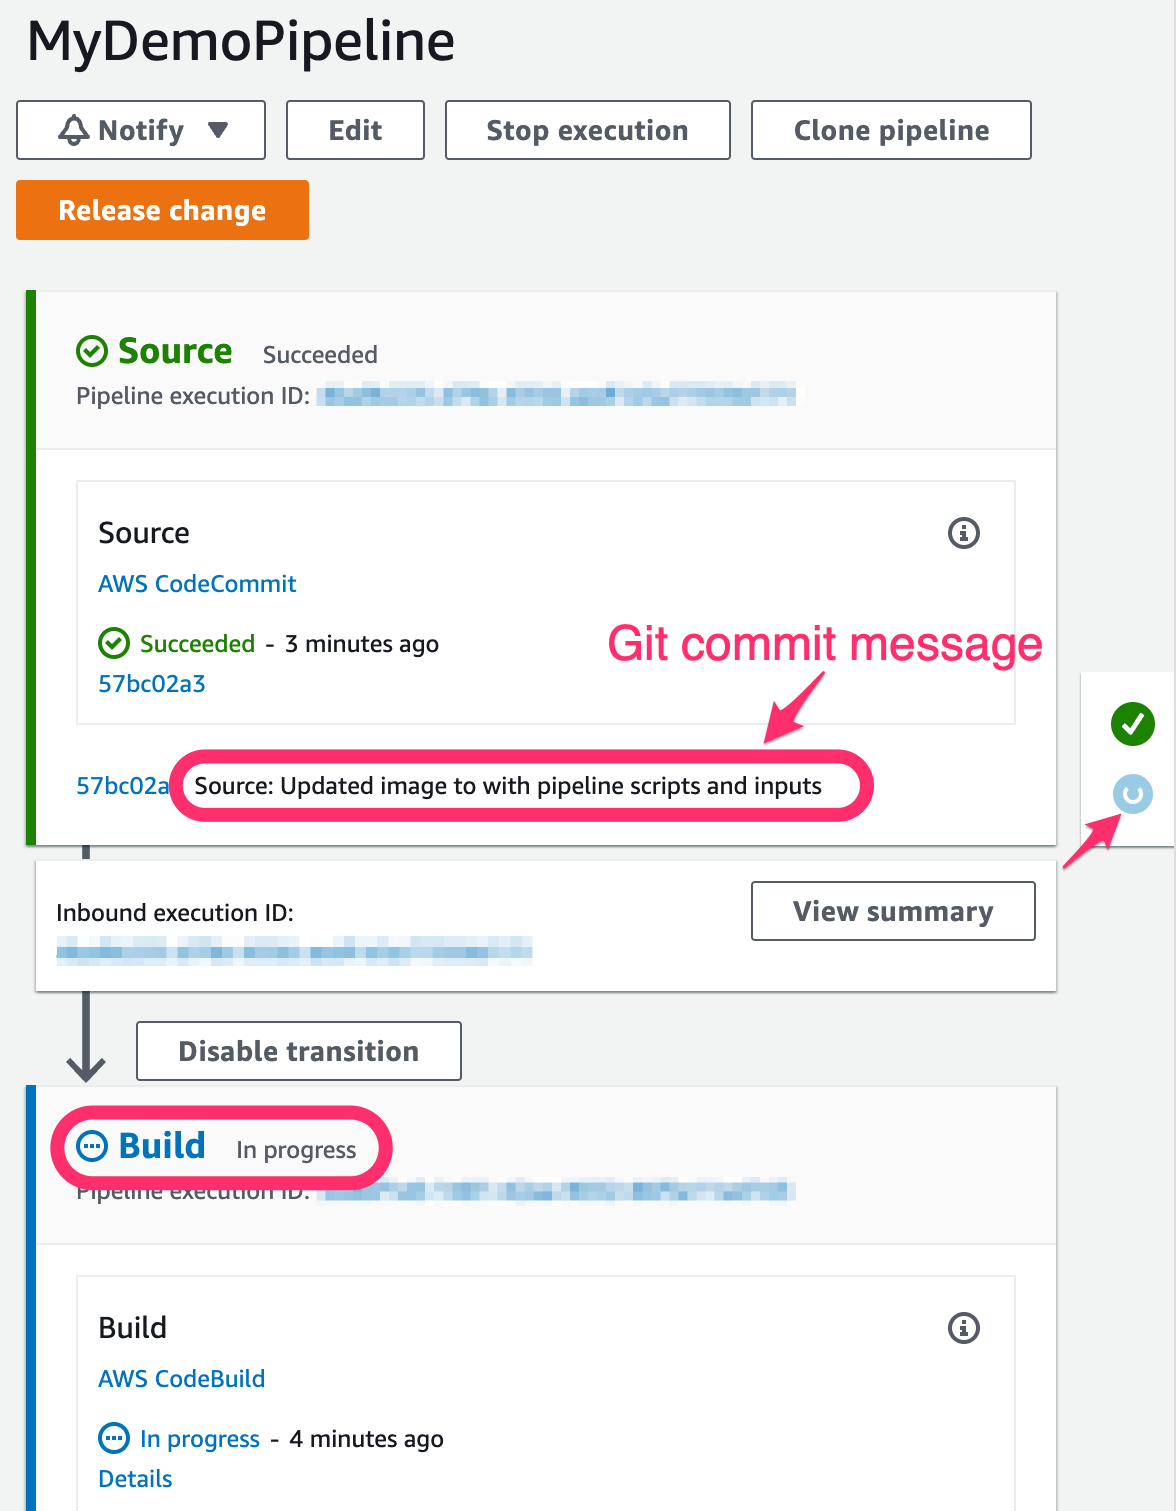
git commit -m "Updated image to with pipeline scripts and inputs"
git push origin main
-
In the AWS Management Console search bar, type and select CodePipeline. Click on the MyDemoPipeline that you created in the previous section. You should now see that the CodeCommit push above should have triggered the build via CodeBuild automatically.
-
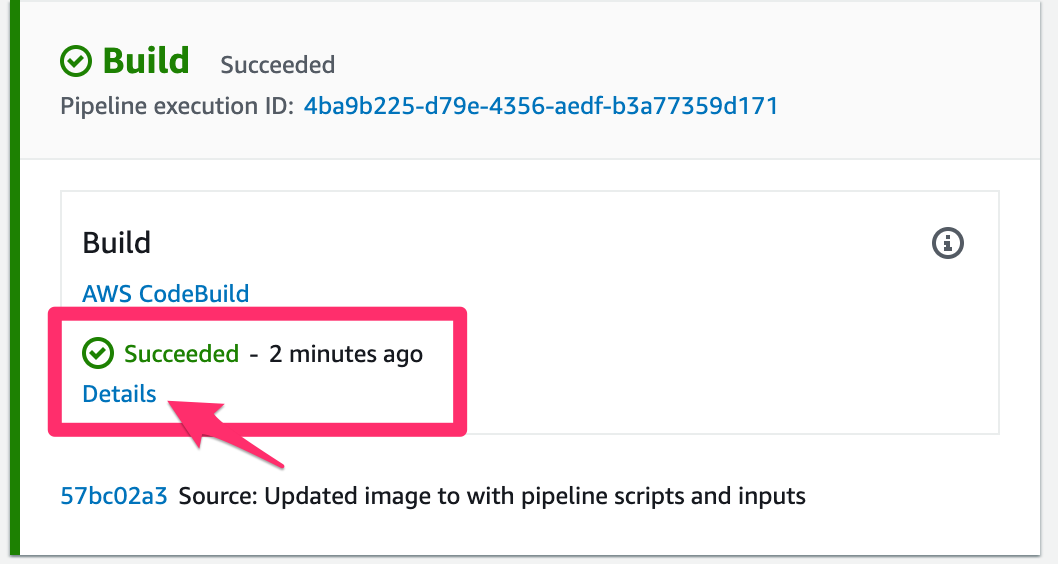
Click on the Details deep link from the Build stage of the CodePipeline. This will take you to build logs from the CodeBuild project that you created:
-
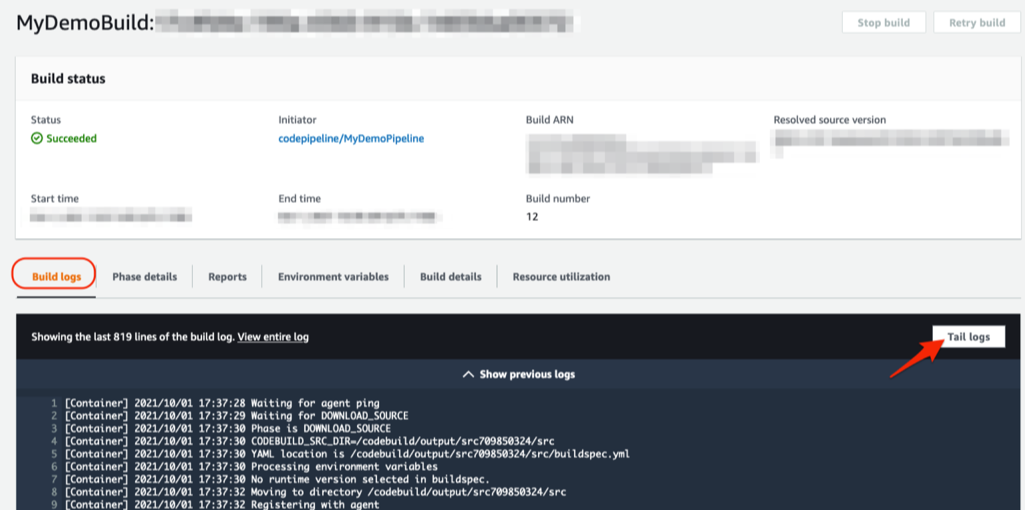
Click on the Tail logs to see the on-going or completed build process. This is showcasing every step of the build process as provided in your buildspec.yml file.

-
In addition to the build the pipeline is also pushing the built container image to the container registry in Amazon ECR.
You can view information on the ECR repository with by running:
aws ecr describe-repostitories
This will return a JSON formatted object describing the repository and its contents.